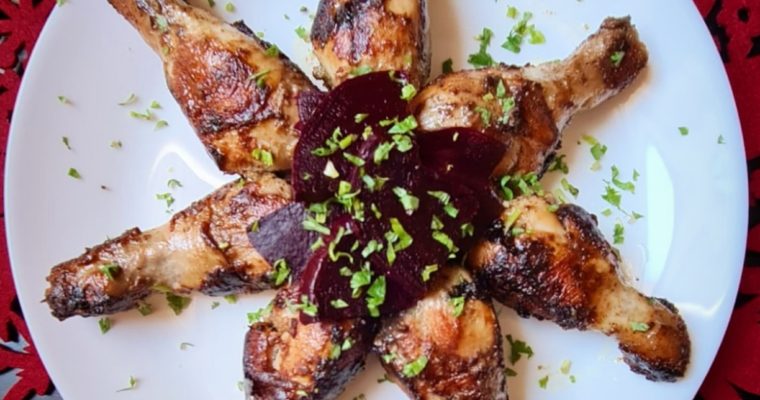
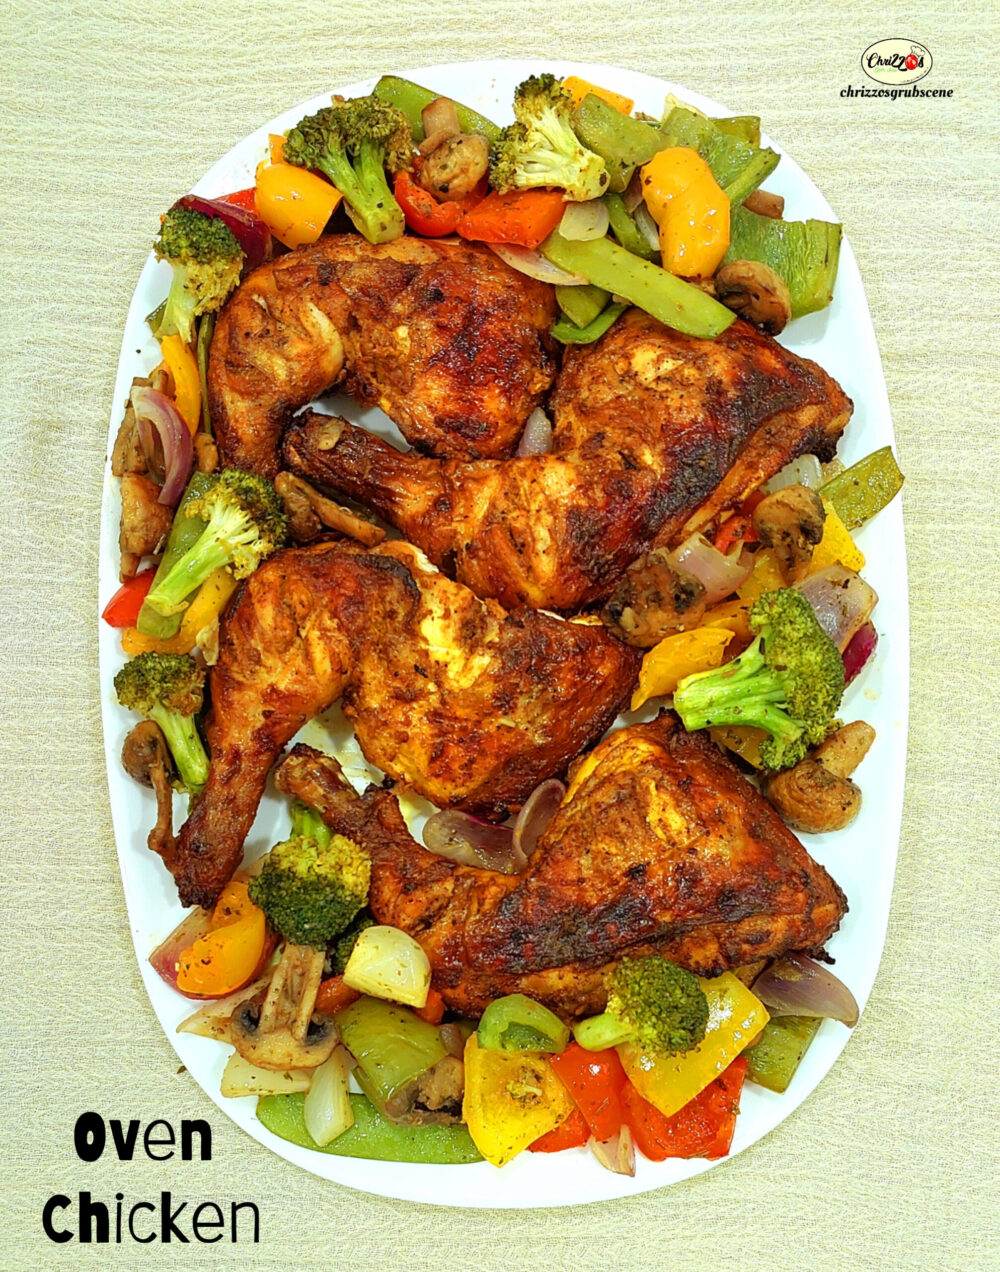
Tag: chicken

Recipe for Saucy Pops

Recipe for Saucy Pops

  I was first introduced to these Saucy Chicken Lollipops at our College Canteen in St. Andrew’s, Bandra. I used to wait when that damn bell would ring and I’d run down to the canteen and grab myself two of these most delicious Saucy, Spicy…

Recipe for “KAISA DIYA” (Quesadilla)

Recipe for “KAISA DIYA” (Quesadilla)

  After months of waiting, My sweet friend Linda and I finally decided to go out for Coffee.We did a recipe shoot for The Family Kitchen Season 2 on COLORS TV here in the UAE and after we finished, we decided to celebrate that joy.We…

Recipe for A One Pot Choris Masala Chicken Pulao

Recipe for A One Pot Choris Masala Chicken Pulao


Recipe for A One Pot Choris Masala Chicken Pulao

Long distance phone calls with your loved ones don’t only last longer than you think they will, they also give some super amazing ideas to try some new stuff!
So I was talking to my cousin Dalu(my 3rd or 4th cousin I still don’t know but easiest way to say cousin..hahah) and I suddenly realised it was lunch time for me and all I could see was a box of marinated chicken. So I asked her what she’d suggest I should make with that. And she gave me a beautiful white sauce recipe but Miss Lazy Bones kept knocking on my head making me think of some shortcut recipes.
Suddenly Dalu says “Just make a One Pot Pulao na”… Use any masala u have, bottle masala maybe?? And in my head I thought of the only bottle I had in my freezer and that was the Choris Masala that remained after I made a batch of Choris last year. I followed Alves Fernandes Choris recipe. The Masala recipe is in the same blog and it’s a No Fail recipe.
I decided to give it a try and it turned out so so good. I found it challenging to convince the Bitter Better that there was not a single piece of Choris in the Pulao. Just the Masala Mennnnnn. But he still dug like a Gold Digger
Marital advice: Sometimes you’ve gotta Trust her with the Rooster! Like Come Onnnn! 😊
So here’s the recipe..
Course Main Course
Cuisine Goan, Indian
Keyword Chevris pulao, chicken, Chicken Pulao, Chicken Rice, Masala Pulao, One Pot Pulao, Pulao
Servings 6 people

Ingredients

  • 1.2kg Chicken cut into medium sized pieces(I have used legand thigh and kept the skin on for some pieces. It helps to keep the chickenmoist. But you can discard the skin if you don’t like it)
  • 2 cups Basmati rice (approx 350gms)
  • 2 Onions sliced
  • 2 green chillies slit(optional)
  • 4 Green cardamom
  • 4 cloves
  • 6 pepper corns
  • 4-6 small pieces of Cinnamon sticks
  • 2-3 Bay leaves
  • 4 Tbspn Choris Masala(Recipe in the blog link given below)
  • 2 Tspn Ginger Garlic paste(Recipe given below)
  • 1.5 Tspn Salt for the chicken
  • 1 Tspn for the Pulao(add only if required)
  • 2 Tbspn Ghee
  • 2 Tbspn Oil

Instructions

  • Wash the chicken and make 2-3 slits on each piece. Marinadethe chicken with salt and ginger garlic paste and keep it over night or for aminimum of 30 minutes if you’re running out of time.
  • When your’re going to make the pulao, soak the rice in Roomtemperature water before starting all the chopping, arranging, etc. so likethat you get about 20 minutes or so for the rice to soak.
    Note: Soaking the rice for about 20minutes or so helps maximumamount of starch to be released from the rice and helps the rice to becomeflufflier after it’s cooked.
  • In a Large vessel(I say large because for Pulao, larger thevessel, grainier will the rice be) heat the Ghee and Oil on  medium heat and once the oil turns hot, addthe cloves, pepper corns, cinnamon, bayleaves and cardamom
    Note: As soon as you throw in the dry spices, ensure tocover the vessel as the spices tend to dance to the music and they have somesuper high jump moves(it sputters in hot oil and may spring out of the vessel.To save yourself from the dancers, just place a lid on the vessel. SIMPLE)
  • In about 2-3 minutes, when the super yum aromatic flavoursof the spices get infused into the oil, add the Chicken, Choris Masala paste, Onions,Tomatoes and Chillies and give it a nice stir and cover the vessel and let itcook for about 15-20 minutes on medium heat.
    Note: Stir it at regular intervals in between but try toavoid being Miss. Impatient Bobby or Mr. Peeking Tom
  • Wash the rice at least thrice or until the water runs clear
    Note: Do not run the tap at full speed or else the rice maybreak with the pressure
    Do not wash the rice as if you’re trying to attack theenemy. Wash it gently just how you’d play with your lover’s hair maybe! If you’rethe kind who pulls each other’s hair, then avoid this example but get the drift!
     The water has to beclear before the rice goes into the vessel. If the water is still cloudy, itmeans the rice still has starch on and the pulao will be sticky. So, don’tworry! You won’t miss the train! Wash the rice patiently till the water runsclear, even if it takes more than 3 times
  • Drain off all the water and add the rice into the vessel. Add4 cups of water into the vessel and give it a gentle stir and cover the vessel.Here you can increase the heat a little
    Note: I like to use a silicon spatula here as the ricegrains need to be treated with utmost love & care just like my Husband treatshis Car! Oh no! Not Me….. it’s the Car first.. ALWAYS!
    Also, before the rice goes in, ensure the water iscompletely drained off. Any excess water, even if little extra, might cause thePulao to turn soft and sticky. The ratio for Pulao is always 1:2 (Rice:Water)
    As soon as the water begins to boil, open the vessel gentlyand check for salt at this stage. The rice will still be raw here. The watershould taste a little extra salty from what we usually eat. This is becauseonce the Rice is fully cooked, the flavour and salt gets infused in each ricegrain and it balances the final taste. So ensure the water is salty at thisstage.
  • Cover the vessel and allow the Pulao to cook until all thewater has fully evaporated
    Once the water is fully evaporated, Turn off the heat and placethe vessel on the kitchen table with the lid kept slightly open for about 10-15minutes(we do not require more heat or else the rice will further cook in it’sown heat and turn soft)
  • After about 10-15 minutes, using the back of a fork or myfavourite Silicon Spatula(to save the long grains), very gently stir the riceand try to separate it each grain from clumping.
    Enjoy this Hot super delish One pot pulao with some chilledraita or a nice vinaigrette salad! Yummmm!

If you like my recipe, don’t forget to “like” & “share” it with your friends and family. And once you’ve tried my recipe, request you to kindly share your valuable feedback with me. I'd Love to hear from You 🙂

    Recipe for White Chicken Fry – Tangdi Dahi Chorr

    Recipe for White Chicken Fry – Tangdi Dahi Chorr

    So, this is just another Chicken Fry Recipe which I created since my Bitter Better and I are a little under the weather and don’t feel like eating anything Spicy.This Chicken Fry Recipe is So simple and with bare minimum ingredients that you’ll easily find…

    Recipe for Spicy Chicken Liver & Heart

    Recipe for Spicy Chicken Liver & Heart

    Recipe for Spicy Chicken Liver & Heart

    Course Appetizer
    Cuisine Goan
    Keyword chicken, Chicken Heart, Chicken Liver, Kaleji, Liver
    Prep Time 10 minutes
    Cook Time 15 minutes
    2 hours
    Total Time 2 hours 25 minutes
    Servings 4 People

    Ingredients

    • 500 gms Chicken Liver and Heart(You can use only Heart or Only Liver if you wish)
    • 1.5 Tsp Ginger Garlic Paste(recipe given below)
    • 1 Tsp Jeerem Meerem Powder(recipe given below)
    • 1 Tbsp Oil
    • 6-8 Curry Leaves
    • 4 Spicy Green Chillies(slit)
    • 2 Dried Red Chillies(roughly hand broken)
    • 2 Tsp Vinegar
    • 1/2 Tsp Turmeric Powder
    • 1/2 Tsp Kashmiri Chilly Powder
    • 4-6 Medium sized Garlic Cloves(crushed)
    • 1/4 Cup Water
    • 2 Tsp Tomato Ketchup
    • 6-8 Sprigs Coriander Leaves(chopped fine)
    • 1 Small Capsicum(optional)
    • 1/2 Tspn Salt

    Instructions

    • Gently wash the Chicken Heart and Liver under running water
      Note:- ensure the water pressure is light or else the Liver might get damaged since it is very delicate
    • Now if the Heart and liver are not separated, cut them and separate them and take off the fat (the white substance) on the sides of the heart and liver
    • Transfer the Liver in a skillet(we will cook the liver in the same ) add all the above mentioned ingredients, except Coriander leaves, Ketchup & Capsicum(if using)
    • Mix it well and let it marinade in the refrigerator for about 1-2 hours or more if you have the time
    • After 1-2 hours, place the skillet on medium high flame
    • As the Gravy starts to boil, add the Ketchup and gently mix it in the gravy
      Note:- while stirring or tossing the Liver, you must do so from the bottom and dont let your Spoon come in contact with with liver or else, the liver will get smashed
    • As the gravy further thickens, add the Chopped coriander and Capsicum (if using) and toss it. Check for salt, vinegar or ketchu
      Note:-Please Do Not forget to add chopped Coriander leaves. The taste gets elevated only once you add chopped Coriander
    • Let the water get evaporated completely and turn off the flame
      Note:- The total time to cook Chicken liver is 10-12 minutes maximum, on high heat. If you over cook it, it will become hard and its not so much fun to eat Hard cooked liver, bit its totally upto you, how you like it!
    • And we're ready to serve!

    Follow these steps to make the Jeerem Meerem Powder

    • Add the following into to a mixer grinder*100gms Cumin seeds*100gms Pepper corns*50gms Cloves (if its too strong, you can add about 25-30gms)*50gms Cinnamon (if you don’t like the cinnamon flavor much, add only 30gms)-Grind all these ingredients to a fine powder-Transfer this spice mix into an Air Tight container -As soon as the powder is ready, it will be hot, due to the pressure of the mixer rotation. Please wait until the spice powder has turned completely cool and only then cover it with a lid-You can use Jeerem Meerem powder to make curries, chilly fries, cutlets, etc. Add the required quantity as per your taste(Please use only a DRY spoon while removing the Jeerem Meerem powder from the Air Tight container)-Jeerem Meerem powder should be stored in a dry place. It can be stored up to 1 year. 

    Follow these steps to make the Ginger Garlic Paste

    • Add the following into a mixer grinder*100 gms Garlic (skinned and roughly chopped)*60 gms Ginger (thoroughly washed and roughly chopped. Some people like to remove the skin of the ginger. I don't. However, you can do it the way you are comfortable :)-Grind these two ingredients to a thick fine paste-Transfer this paste into an Air Tight container-As soon as the paste is ready, it will be hot, due to the pressure of the mixer rotation. Please wait until the paste has turned completely cool and only then cover it with a lid-Ginger Garlic paste should be stored in the refrigerator. It can be stored up to 15-20 days

    If you like my recipe, don’t forget to “like” & “share” it with your friends and family. And once you’ve tried my recipe, request you to kindly share your valuable feedback with me. I'd Love to hear from You 🙂

      Recipe for Chicken Fry

      Recipe for Chicken Fry

      Recipe for Chicken fry

      Course Appetizer
      Cuisine Goan, Indian
      Keyword chicken, Chicken fry
      Prep Time 10 minutes
      Cook Time 25 minutes
      Total Time 35 minutes
      Servings 6 pcs

      Ingredients

      • 6 Chicken Drumsticks (you can keep the skin on if you like)
      • 2 Tsp Kashmiri Chilly Powder
      • 1/2 Tsp Black or white Pepper Powder
      • 1/2 Tsp Garam Masala powder
      • Juice of 1 Medium sized Lemon
      • 1 Tsp Ginger Garlic paste (recipe mentioned below)
      • 3-4 Sprigs Fresh Coriander(optional) (chopped fine)
      • 5-7 Curry Leaves (optional)
      • 2 Tbsp Coconut Oil or any Cooking oil of your choice

      Instructions

      • Wash the Chicken drumsticks thoroughly and make 2-3 incissions on each drumstick
      • In a bowl, Add all the above mentioned ingredients(except oil & curry leaves) to the drumsticks and hand mix it well till each drumstick is coated with the marinade
      • Cover the bowl with a lid and place it in the refrigerator for at least 6-8 hours or overnight
      • After 6-8 hours, remove the bowl from the refrigerator
      • In a Pan(preferably Non stick) add 2 tbspn oil and place it on medium high flame
      • Once the oil turns hot, add in the marinaded chicken drumsticks and curry leaves, if using, on to the pan and cover the pan.
        Note:- If the oil is not hot enough, the chicken will get stuck to the pan
        Also, if your not using a Non stick pan, ensure that the oil is Hot enough or else the chicken will get stuck to the pan.
      • After 6-7 minutes Turn the chicken drumsticks on the other side and cover the pan.
      • After 6-7 minutes, take off the lid from the pan and reduce the flame
        Note:- The chicken will have a Crusty top on both sides, at this stage
      • Allow each side of the Chicken to further cook on medium low flame for another 8-10 minutes with the pan covered
      • Once done, turn the flame off and place the drumsticks on a Kitchen paper napkin to remove any excess oil
      • Your drumsticks are ready to be enjoyed Smoking Hot😋

      Follow these steps to make the Ginger Garlic Paste

      • Add the following into a mixer grinder*100 gms Garlic (skinned and roughly chopped)*60 gms Ginger (thoroughly washed and roughly chopped. Some people like to remove the skin of the ginger. I don't. However, you can do it the way you are comfortable :)-Grind these two ingredients to a thick fine paste-Transfer this paste into an Air Tight container-As soon as the paste is ready, it will be hot, due to the pressure of the mixer rotation. Please wait until the paste has turned completely cool and only then cover it with a lid-Ginger Garlic paste should be stored in the refrigerator. It can be stored up to 15-20 days

      If you like my recipe, don’t forget to “like” & “share” it with your friends and family. And once you’ve tried my recipe, request you to kindly share your valuable feedback/suggestions with me. I'd Love to hear from You 🙂